Have you ever waited for an email from someone only to find out that their message has gone straight to your Gmail SPAM folder or Promotions tab? Email marketing platforms like MailChimp try to help with this by inserting a link that supposedly adds the sender to your safe list, but it doesn’t always work, and it can be a bit confusing depending on your mail app (desktop and/or mobile). Gmail does not have a safe sender list but there are still ways to whitelist or mark a contact as safe so that you never miss another email from them. We’re going to talk about the 3 different ways of doing this in 2022.
Mark Email as “Not Spam”
If you received an email and it went to the spam folder, the easiest way to make sure it always gets delivered to your inbox is to mark it as “not spam.”
1. Go to the spam folder and look for the email
(Please note, I had to put my own email into spam for demonstration purposes.)
2. Right click on the email and click on Not spam.
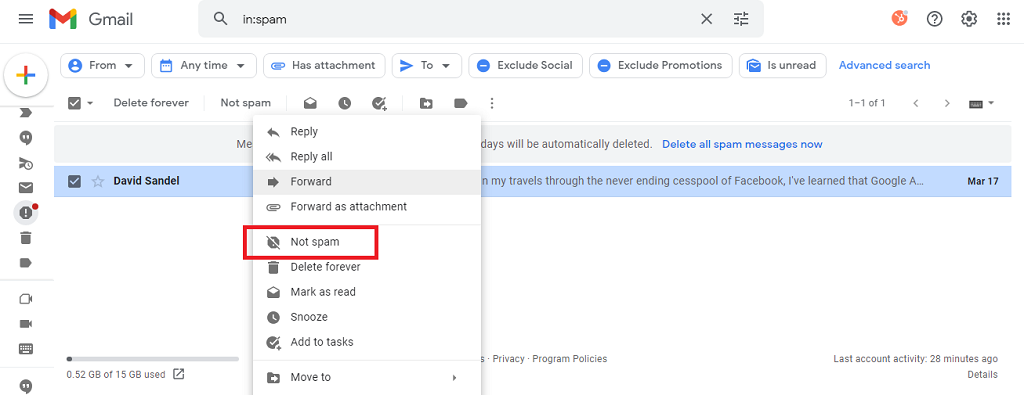
You can also select the checkbox next to the message in the spam folder, and click the “Not spam” button, or open the message and find the “Not spam” button in the message option toolbar as well. Either of these 3 options will work.
This action will automatically move the message to your inbox and tells Gmail that you are interested in this type of message.
Create a Filter in Gmail
Gmail lets you create a rule to keep emails from specific senders from going to your spam folder. To add a filter, follow these steps:
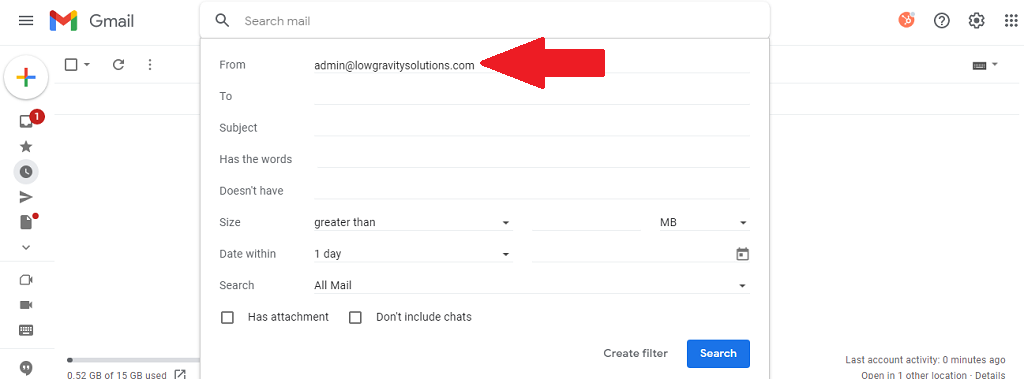
1. Go to gmail.com, login to your account, and click on the Show search options icon on the search box

2. On the search form From field, type in the sender’s email address
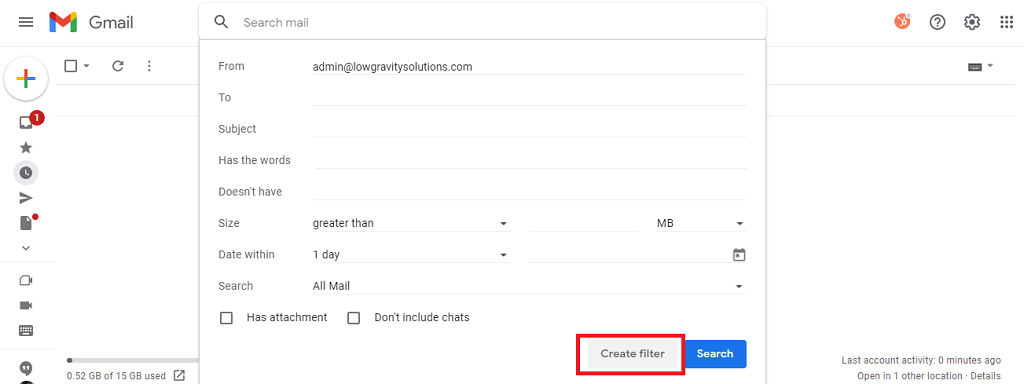
3. Click on the Create Filter button at the bottom of the pop-out form
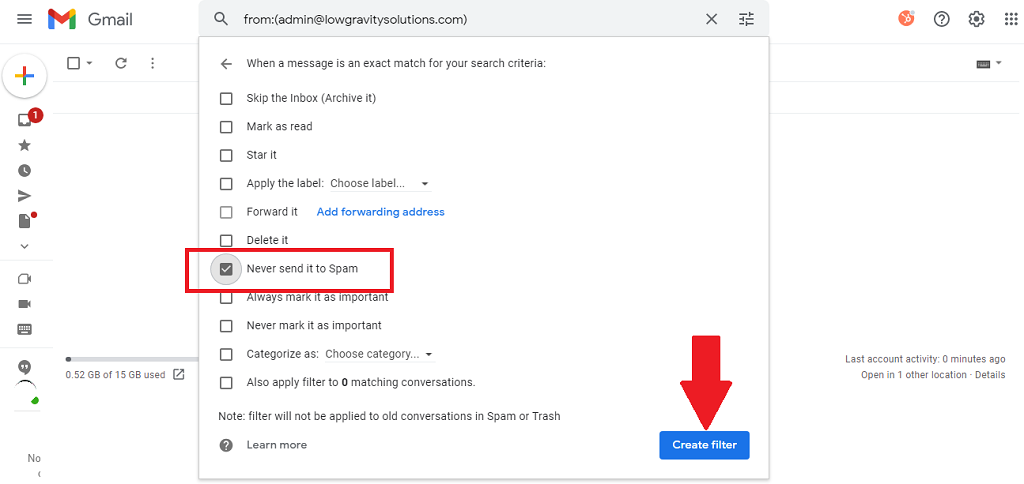
4. Tick the Never send it to Spam checkbox and click on Create Filter to save the new filter
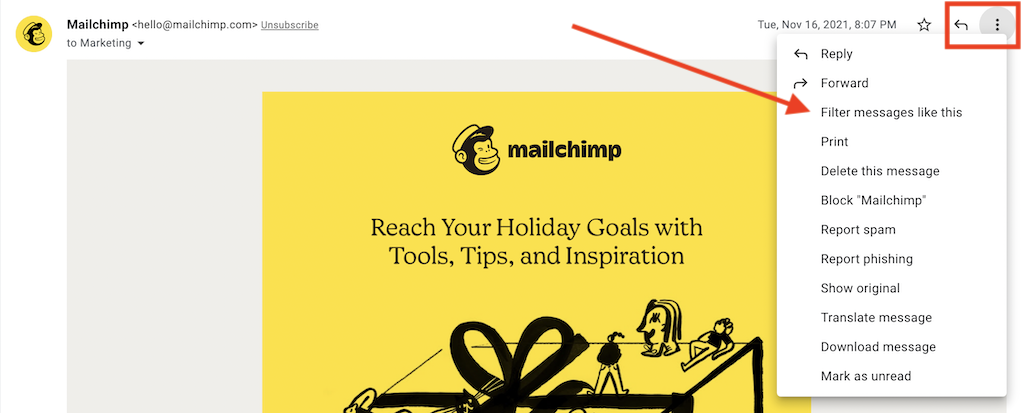
Another option is to open the message, click the 3-dots next to the “reply” arrow, and select create a filter from there. Then follow all previous steps.
Related: Copywriting tips to stay out of the SPAM folder.
Add the Contact in Gmail
Adding a person’s email address to your contact list tells Gmail that you want to receive messages from that sender, effectively allowing you to whitelist a contact in Gmail. The easiest way to add a sender as contact is within Gmail itself, and this is how it’s done:
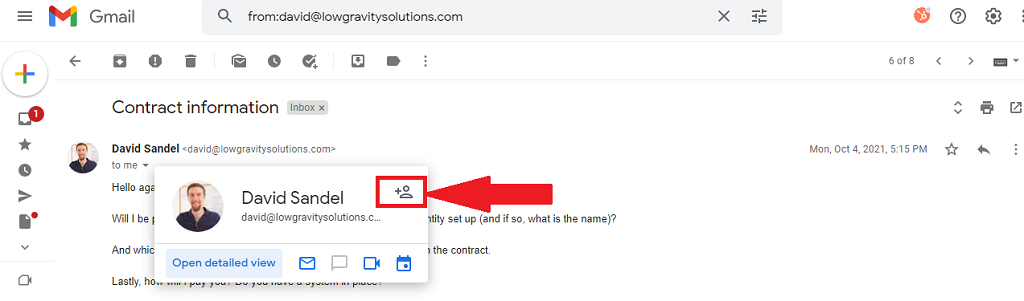
1. Open an email from the person you want to add as a contact
2. Hover over their name until a box with more details appears
3. Click on the icon with the plus sign at the upper right corner of the box
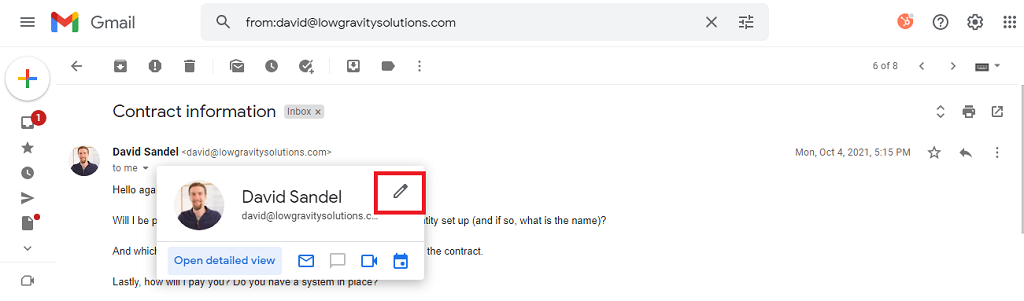
4. Once added, the icon will change to the Edit contact icon showing an image of a pencil
Add Contacts in Google Contacts
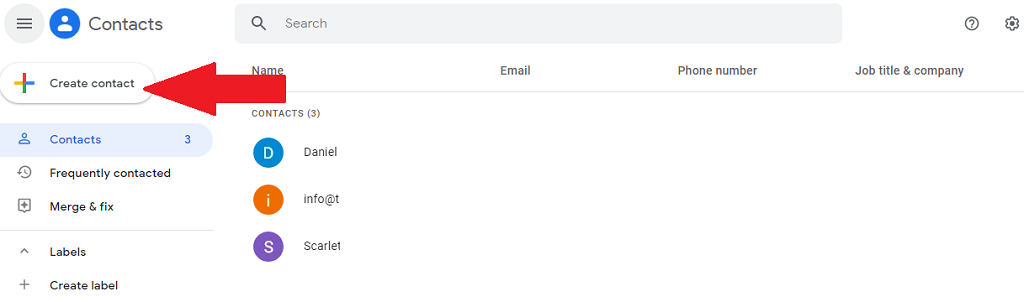
If you plan to add multiple contacts to your Gmail contact list, your best option is to add them through Google Contacts. To do this, follow these steps:
1. Go to contacts.google.com
Like most people, you may have different Google accounts for personal and work or business use. Adding contacts to one account will not automatically create them in the other, so make sure that you are logged in to the correct Google account.
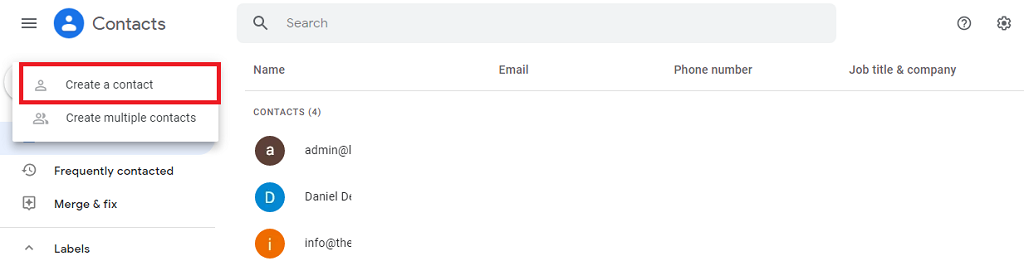
2. Click on the Create Contact button at the upper left side of the screen
3. Select Create multiple contacts to add more than one sender to your contact list
If you only need to add one contact, you may proceed to Step 6.

4. Type in the email addresses you want to add, separated by a comma, and click on Create

Take note that you may also import contacts by uploading a CSV or vCard file.
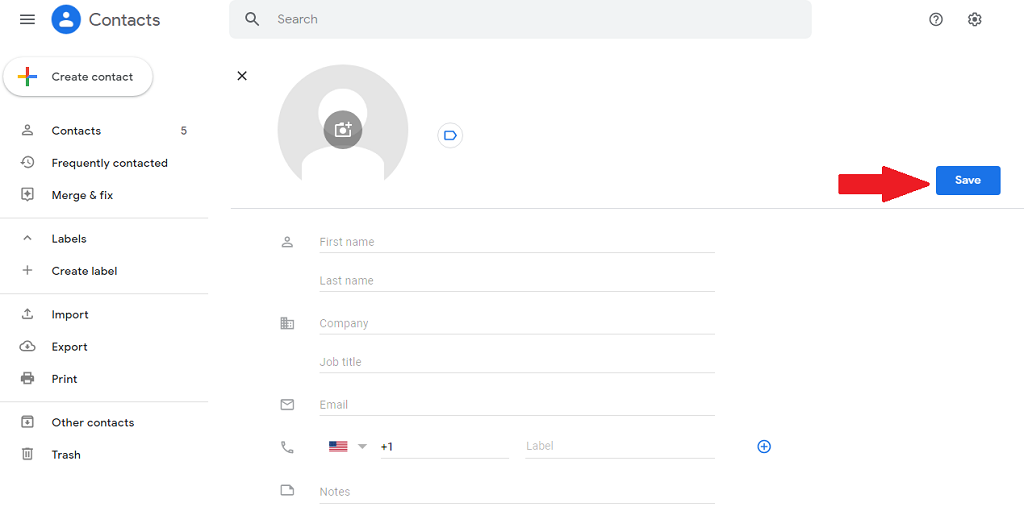
6. If you only need to add one contact, you can select Create Contact
7. Fill out the details on the form and click on Save
You can upload the person’s photo and add relevant notes, aside from his or her contact information.
Let me know if I’ve missed anything, and I’ll be sure to update this post.
0 Comments