Any time I need to access a client’s WordPress website, it’s always better to add me as an Admin user instead of giving me your login credentials. For one, most people tend to reuse passwords. So if you give out your WordPress password, you’re likely giving out the password to several other of your accounts. For two, if you have two-factor authentication, we’ll skip past the need to share verification codes with each other.
This is a simple 5-step process to add a WordPress Admin User that will only take you 3-minutes after you’ve done it once.
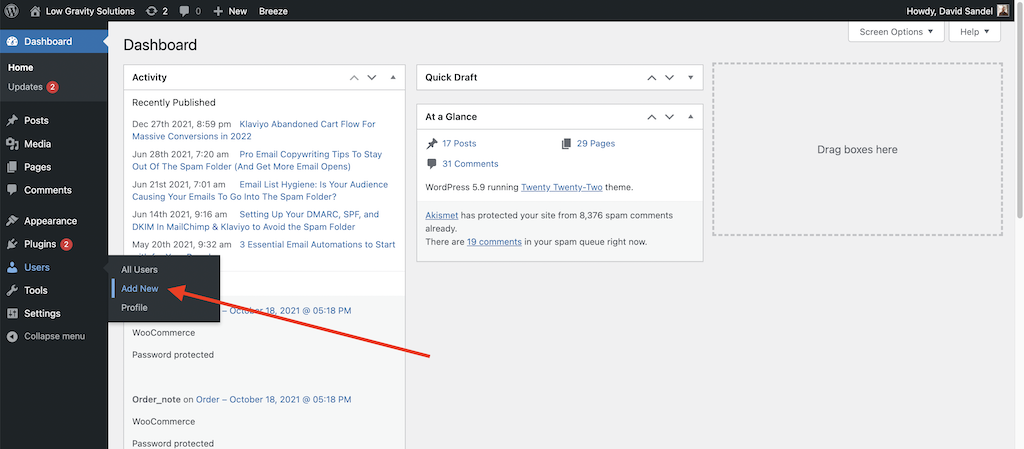
1. Login to the WordPress Dashboard

2. Hover over “Users” and click on ‘Add New’
“Users” is located on the left-hand navigation panel. Depending on the number of plugins you have installed, you may or may not have to scroll down the page a little.
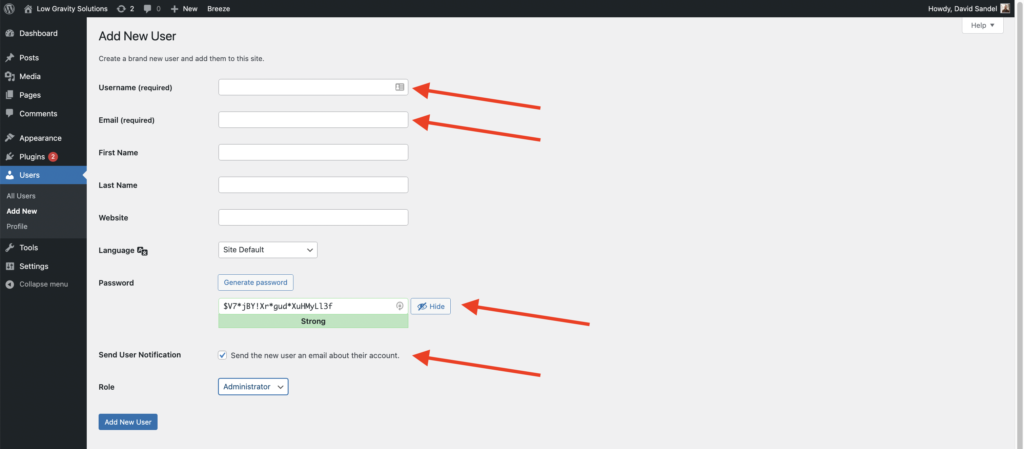
3. Fill in the required fields
- Username: Make it easy. Use their first name or full name.
- Email: Use their actual email. The newly created WordPress login information will be sent there.
- Leave the pre-filled password that is already generated by WordPress
- Leave the checkbox marked to email the user
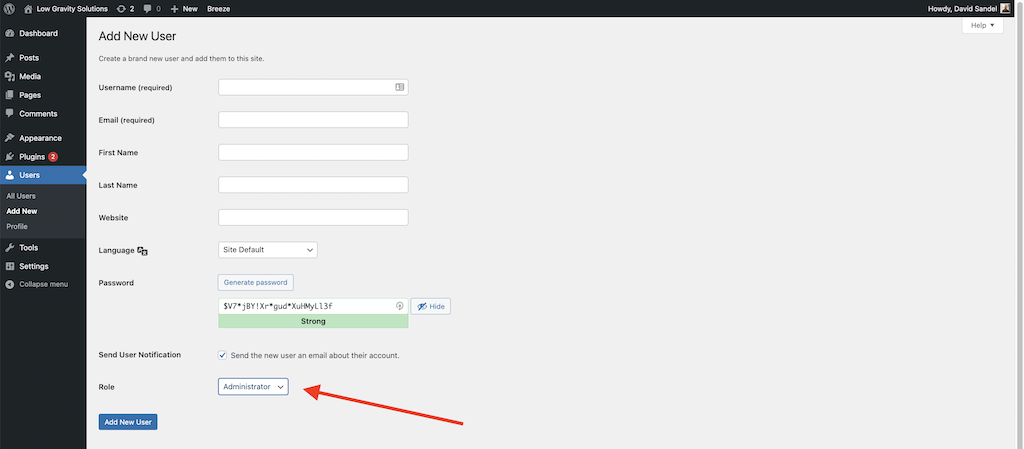
4. Select “Administrator” as the role.
You can already see this in the previous image above, but since this is the most important of adding a WordPress Admin User, it deserves an arrow all by itself.
5. Click the “Add New User” button
If you’ve filled everything out correctly, the new user will receive an email with the WordPress login credentials you provided.
0 Comments