How to Add a User to Your Zapier Account (2022)
If you’re trying to add someone to your Zapier account without having to share your direct login information, I probably have some bad news for you. To create separate user logins under your own account, you need to have a Zapier Teams or Zapier Company account. Otherwise, if you’re like most people and are on a Free, Starter, or Professional plan, you’re stuck with sharing your username and password with that person/people/agency.
Using LastPass to Securely Share Passwords
Since exactly zero of my clients have ever had a Team or Company account, I highly recommend signing up for a service like LastPass to securely share passwords (and manage all your online passwords, notes, and credit cards in one central location). When both people have a LasPass account and you share account logins, LastPass hides your actual password from the person you’re sharing it with. So, if you were working with LGS and shared your password with me, yes, I could gain access to your account, but no, I don’t know the actual password.
That is a very important security measure because most people reuse their username and passwords. So just because you think you’re only giving me access to Zapier, if I were an untrustworthy person, I could try that same username and password combination on things like your personal email, bank account, Netflix, etc.
 We’re getting off the topic of adding users to your Zapier account, but you can see why sharing a password in a secure method is so important.
Using OneTimeSecret to Securely Share Passwords
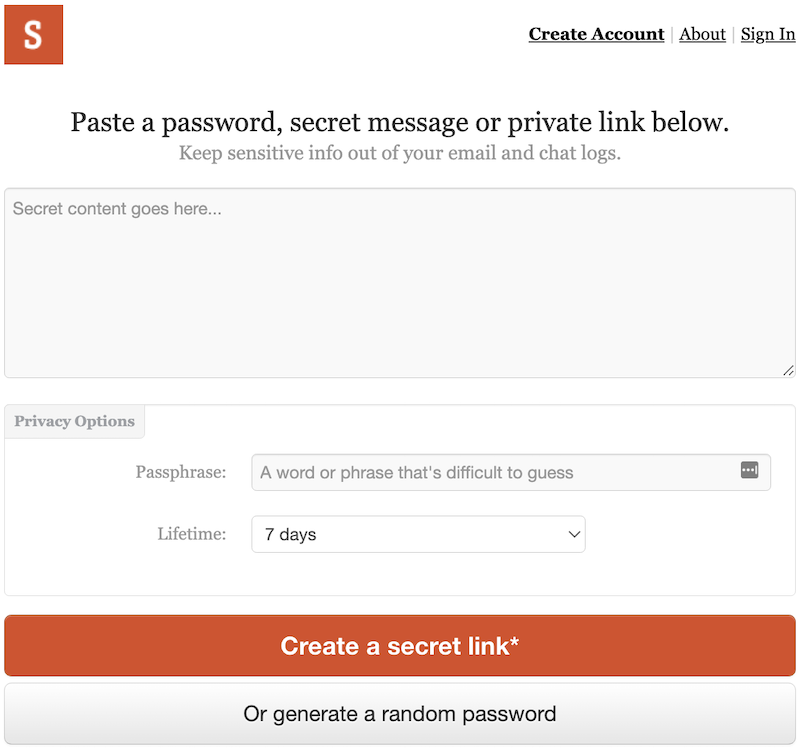
If you don’t like the idea of signing up for yet another account just to share passwords, I also suggest OneTimeSecret. Here, you can virtually share anything you can type. The only downside is that the person receiving it will, and needs to, see your actual password. So, if you decide to use this service make sure you change your password before sharing it. Once the project is over or that person doesn’t need access anymore, you’re free to change it back.
Adding Users to Zapier Teams and Zapier Company Accounts
If you’re one of the lucky few to have a Teams or Company account, you just have to follow three simple steps add a user to your account. The people you add can share tasks, app connections, Zaps, and a few other things outlined below.
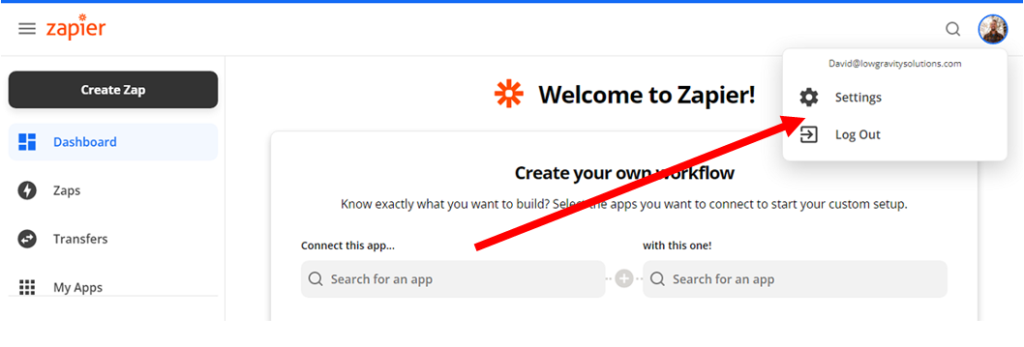
1. Login to your Zapier account and go to Settings by clicking on your profile photo
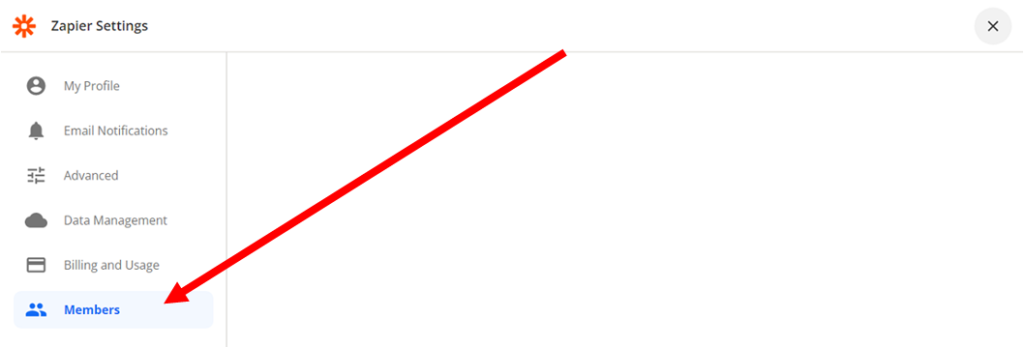
2. Go to Members and click on Add Members
3. Enter the email address of the person or agency you want to add
To add more than one user, simply separate each email address with a comma. An email invitation will be sent to the person/people you added so make sure you entered the right email address.
If the email address is already tied to a Zapier account, all the owner has to do is accept your invite. But if there’s no Zapier account for the email address yet, the user would have to sign up first.
What Can Members Do in Your Zapier Account?
When you add a user to your Zapier Teams or Company account, you are giving them access to some information and the ability to perform certain actions. Here are the permissions a member has on your Zapier account:
- Access shared folders and app connections
- Export and import their Zap data
- Invite other users to your account
- Add and manage teams for Zapier for Company accounts
- Share Zaps to other users and transfer Zap ownership
- Move a Zap to another shared folder or to the trash folder
- Delete their own tasks and Zap runs
If you need to give more access to the member, you can change their role to admin from the Member settings window. You may also transfer team or company account ownership to a member, but this time, you need to go to your Organization Settings.
Permissions Members Don’t Have
As the account owner and administrator, you have certain access and account privileges that members don’t have. They have a limited view of the account and cannot do any of the following:
- View your invoices, payment details, and other billing information
- Change the plan’s billing cycle
- Upgrade or downgrade your Zapier subscription plan
- Remove a team member
- Turn on or off Auto-replay for failed Zap runs
- Change the team name and account logo
- Transfer team ownership
- Delete the company account
- Modify Zap history retention for Zapier for Company accounts
- Manage access to applications for Zapier for Company accounts
Removing Users From Your Account
If you need to remove a user from your team or company account, you can do so from the same window where you added them. Simply go to the Member settings (Step 2 above), click on the gear icon beside the user’s name, and click on Remove Member.
LGS provides automated digital marketing and process automation service to seven-figure companies with above-industry results. Feel free to contact us now for a free 30-minute consultation.
