Messages on Gmail’s Primary tab are the first ones you see when you log in to your email. You take action on these emails, while those on the Promotions and Social tabs get ignored most of the time. If you want to better understand how messages are sorted, you may read this post by Zero Bounce. To make sure you won’t end up ignoring an important message from your favorite brand, you may want to permanently add the sender to the Gmail Primary tab.
There are several ways to do this. In this post, we’re going to share with you five methods for adding a sender to your Gmail Primary tab. These are:
- Dragging and dropping emails to the Primary tab
- Adding the sender’s email address to your contacts list
- Creating a filter
- Marking the email as Not Promotions
- Disabling your Promotions or Social tab
The step-by-step processes for each method are below:
Method 1: Drag and drop emails to the Primary tab
When you see emails on the Promotions or Social tab that shouldn’t be there (or even if they are marketing emails but you really want to see them, i.e. from LGS), you can simply drag them from the current tab and drop them into the Primary tab. Here’s how it’s done:
1. Long press on the message you want to move until the Move 1 conversation alert appears
2. Drag the message and drop it to the Primary tab by releasing the mouse button
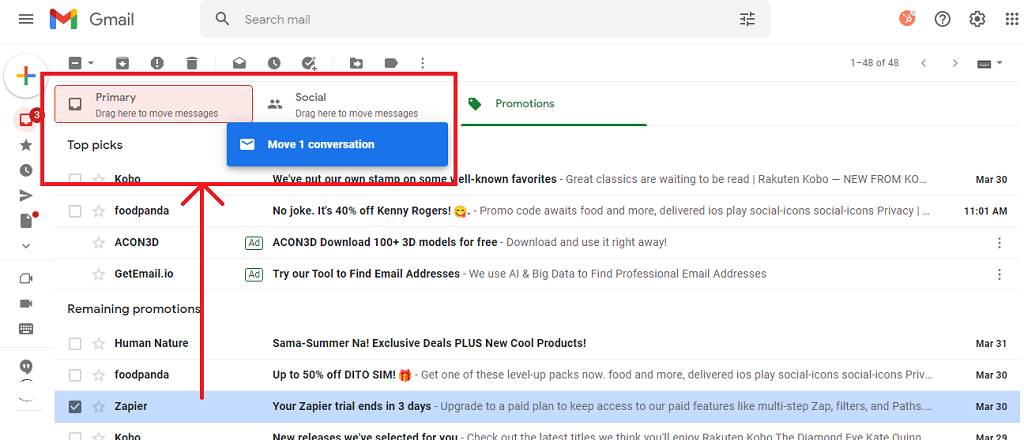
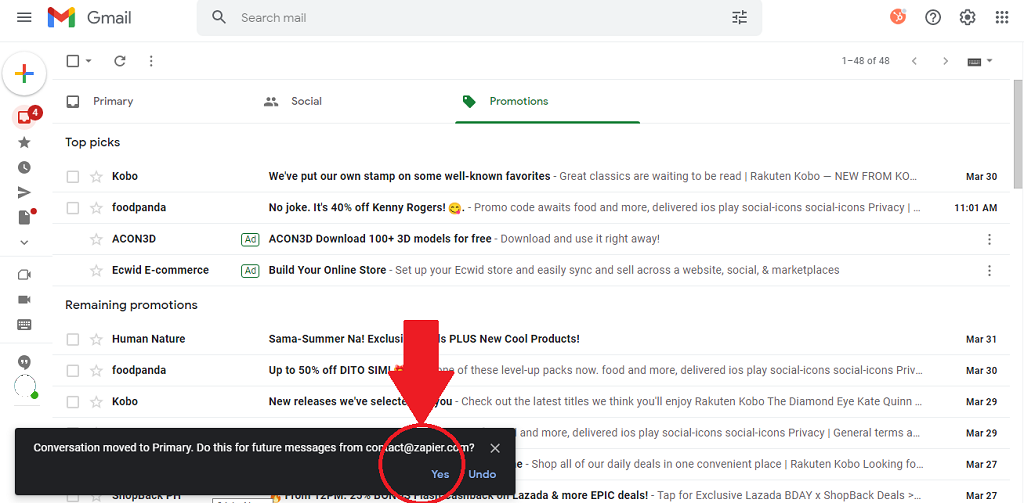
3. Click on Yes at the bottom of the screen to permanently add the sender to your Gmail Primary tab
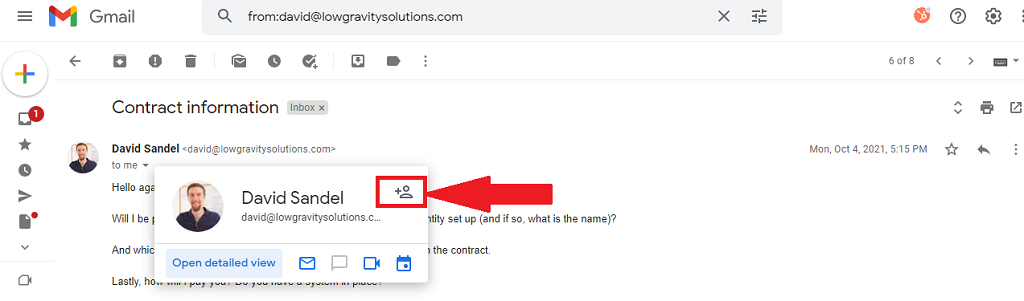
Method 2: Add the sender’s email address to your contacts list
A person sending you emails may end up in the Promotions tab, especially when they use their company email address. You can add them as your contact in Gmail so future messages will automatically appear in your Primary tab. Follow the steps below to add a sender to your contacts list:
1. Open the sender’s message
2. Hover over the person’s name until a box displaying more information about the sender appears
3. Click on the Add to contacts icon
Method 3: Create a filter
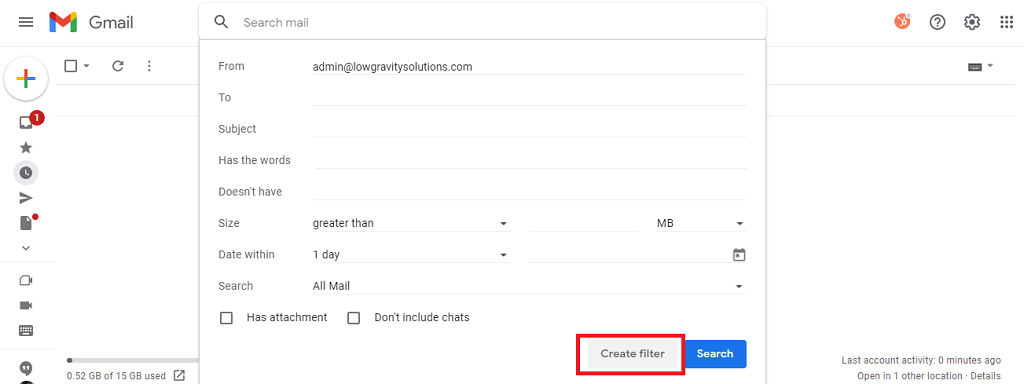
Another way to permanently add a sender to your Gmail Primary tab is to create a rule or filter for the particular email address. To do this, follow these steps:
1. Click on the Show search options button located on the search box

2. Type in the sender’s email address and click on Create filter
3. Mark the Never send it to Spam and Categorize as Primary checkboxes
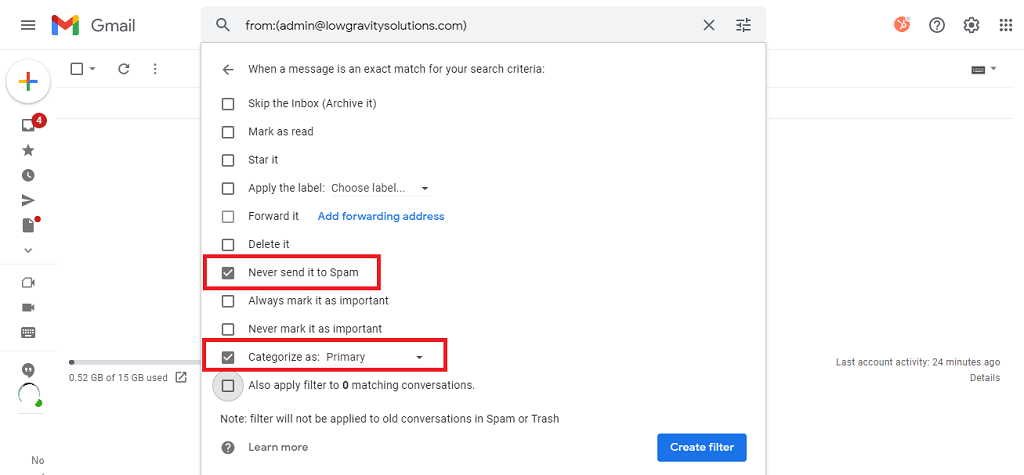
The dropdown button on the Categorize as checkbox allows you to select different tabs. If you want to apply the filter to past messages from the same sender, you may also mark the last checkbox labeled as Also apply filter to.
4. Click on the Create filter button to save the new filter
Method 4: Mark the email as Not “Promotions” or Not “Social”
Gmail gives allows users to remove emails from their current tabs by marking them as Not “Promotions” or Not “Social.” This method is only a three-step process:
1. Go to the Promotions or Social tab
2. Open the email you want to move to your Gmail Primary tab
3. Click on Not “Promotions” (if you are in the Promotions tab) or Not “Social” (if you’re in the Social tab)
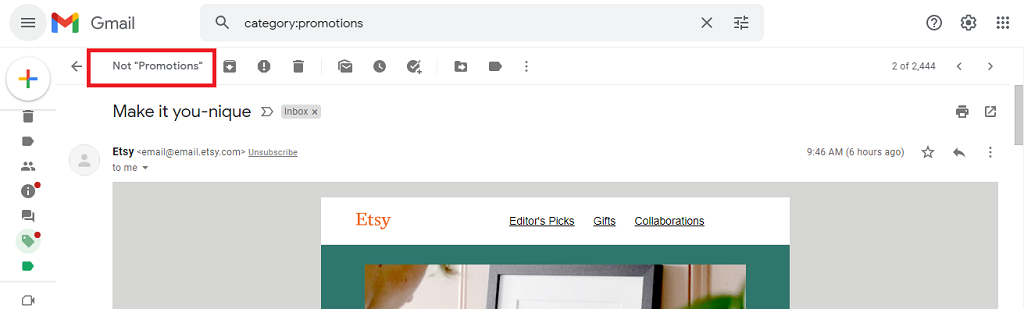
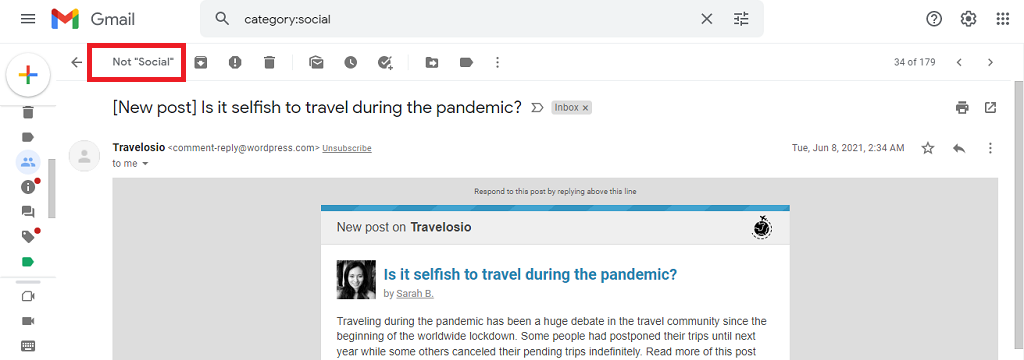
This action will remove the message from its current tab and move it to the Primary tab, but may not be enough to tell the Gmail algorithm that you want future messages from the same sender to be sent to the Primary tab.
Method 5: Disable your Promotions or Social tab
Your last resort is to disable your Promotions or Social tab. However, we suggest you do this with caution since disabling the other tabs will cause all emails to fall under the Primary tab, regardless if they are truly promotional or social. To disable other Gmail tabs, follow these steps:
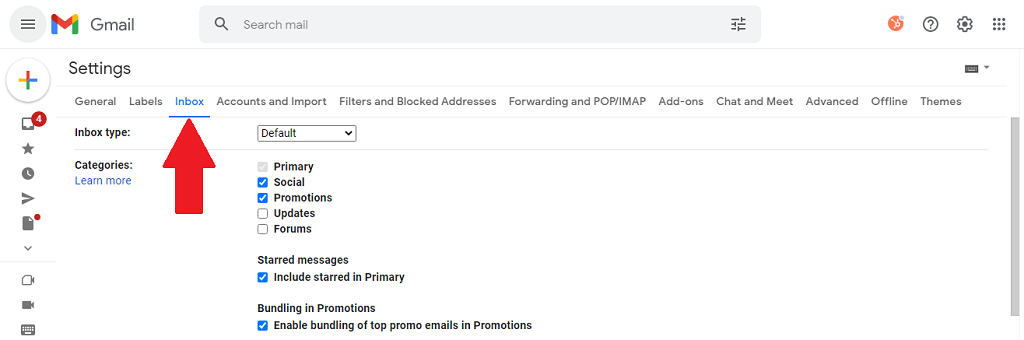
1. Click on the gear icon beside your thumbnail and click on See all settings
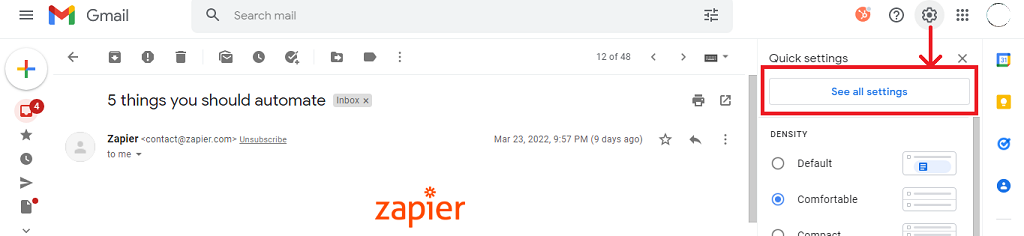
2. Select Inbox to go to your Inbox settings
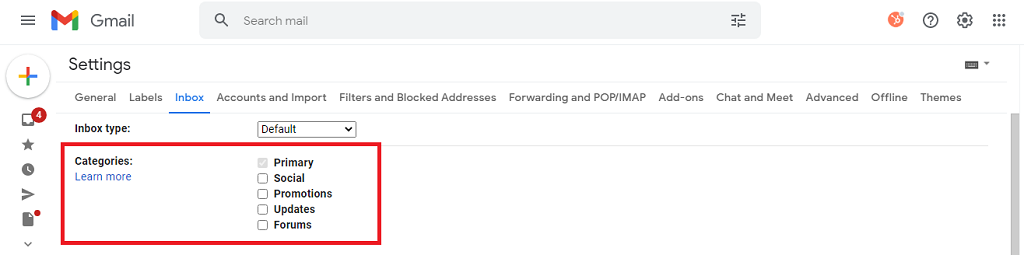
3. Uncheck the Social or Promotions tab
This is where you can manage your tabs or categories. You can choose to disable or enable them from the Inbox settings.
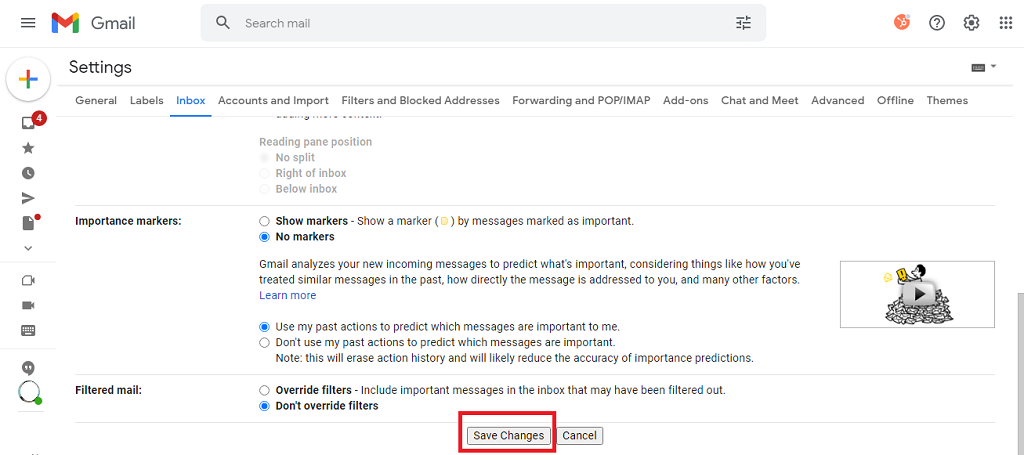
4. Click Save Changes at the bottom of the page
0 Comments