
What is MailChimp Domain Authentication and Why Do I Care?
 MailChimp Domain Authentication is a trackable piece of embedded code in your MailChimp email header that most humans never see. It tells the internet provider of your MailChimp List subscriber’s internet service provider that you’re a legitimate sender, and not a Nigerian Prince trying to scam you out of millions of dollars. Basically, it helps your MailChimp email campaign or automation arrive in your subscribers’ inboxes and NOT their SPAM folders.
Let’s look at this way… You create a MailChimp newsletter and send it to all your subscribers. It gets delivered to the outer gates of your contact’s email provider, and they ask for some ID. MailChimp says, “No problem, here’s my authentication.” The contact’s email provider then says, “Cool, the inbox is right this way.” — Without proper identification, the newsletter may or may not end up in the inbox. It could go to SPAM. And if you’re selling something or in the middle of an automation funnel, you definitely want that email going to their inbox.
What MailChimp Domain Authentication Looks Like to Your Contacts
Another cool thing that happens when you authenticate your domain is the way it looks in your contacts’ inboxes. Instead of showing something like:
David Sandel [email protected] via blahblah.mailchimp.com
It will just show
David Sandel <[email protected]>
like any other normal email you receive from your friends and family.
MailChimp Instructions for Domain Authentication
MailChimp does an excellent job of explaining how to authenticate your domain, and it’s incredibly easy. Just follow these simple steps to find them:
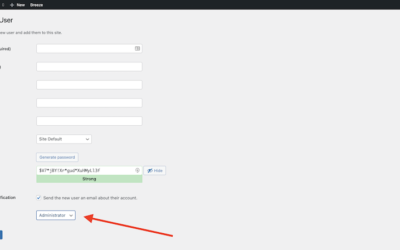
1. Sign-in to your MailChimp account, and then choose “Account” from the drop-down menu next to your name in the upper-righthand corner of the screen.
2. Click on the “Settings” tab and choose “Verified Domains.”
3. Click on “View Setup Instructions” for the domain you would like to authenticate.
4. You should now be able to see the instructions.
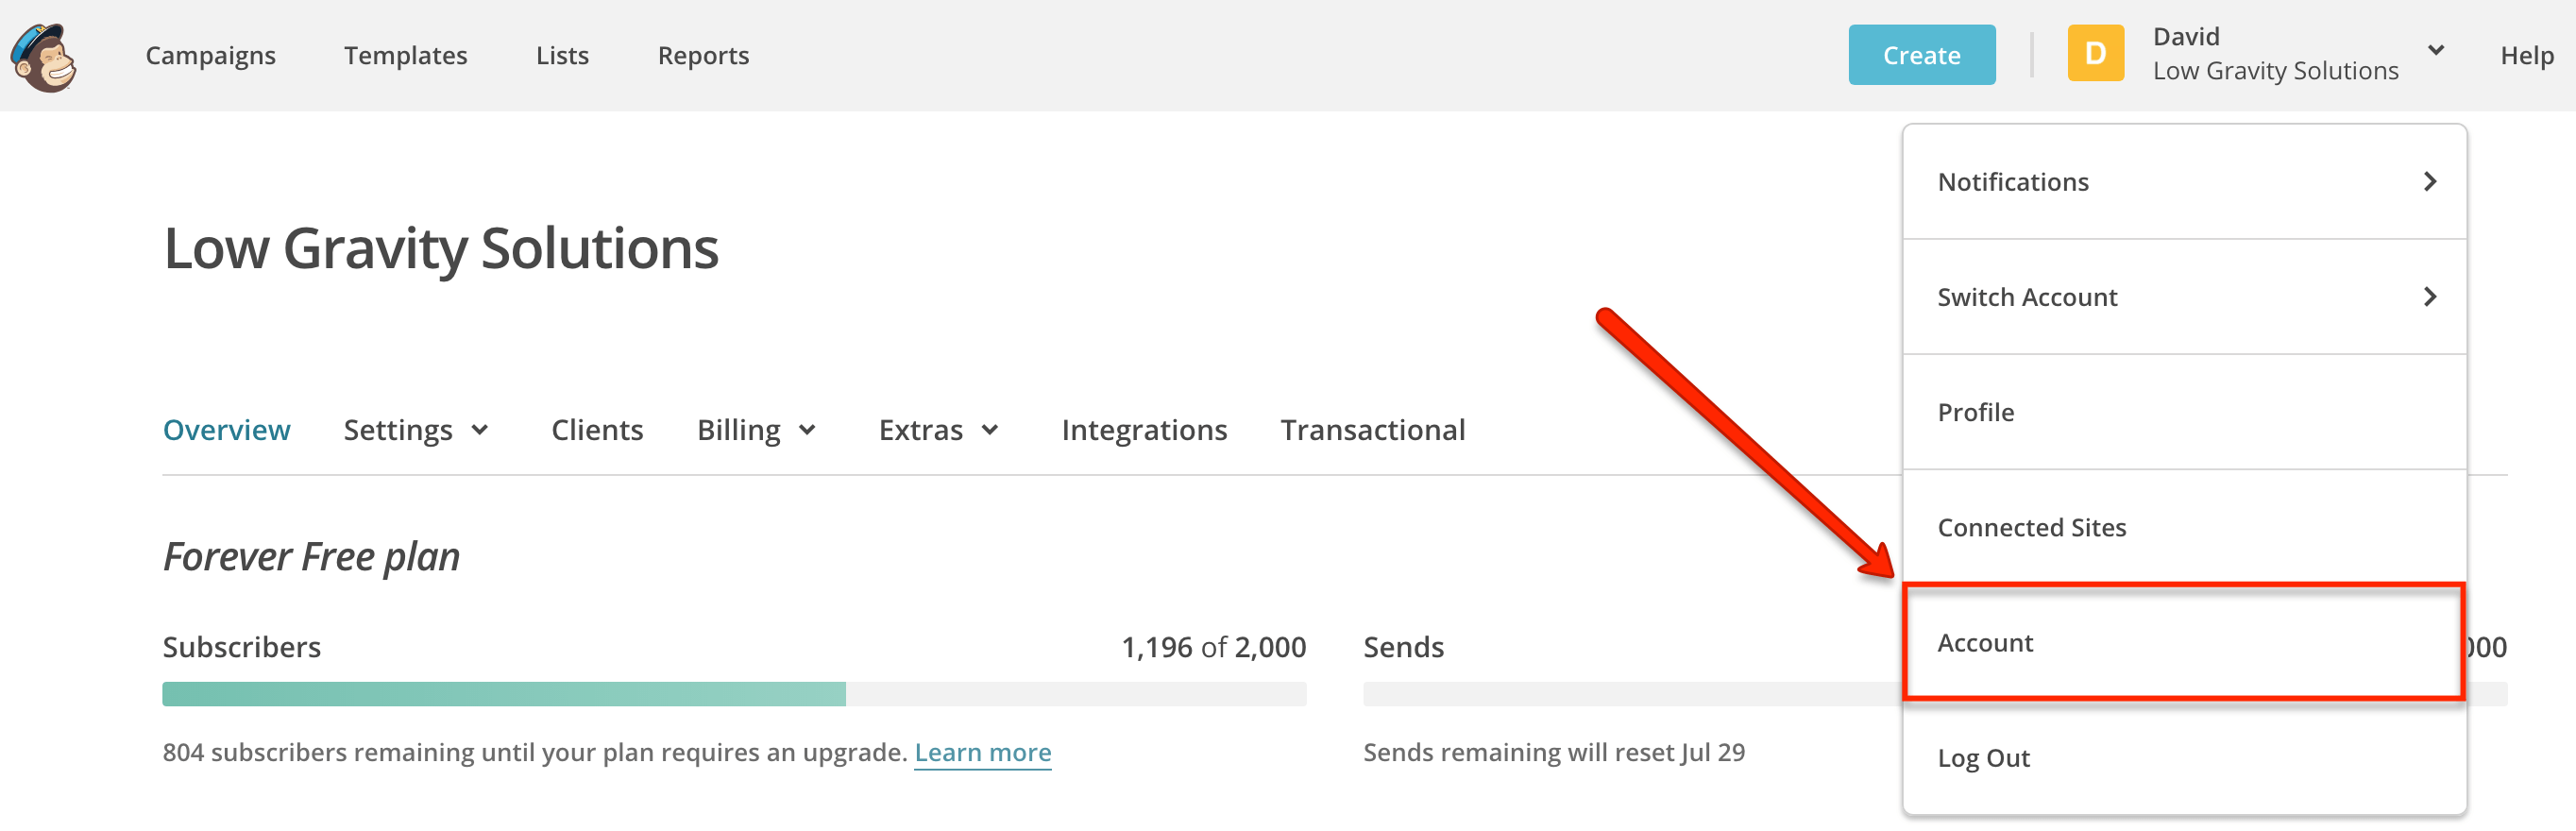
MailChimp Account
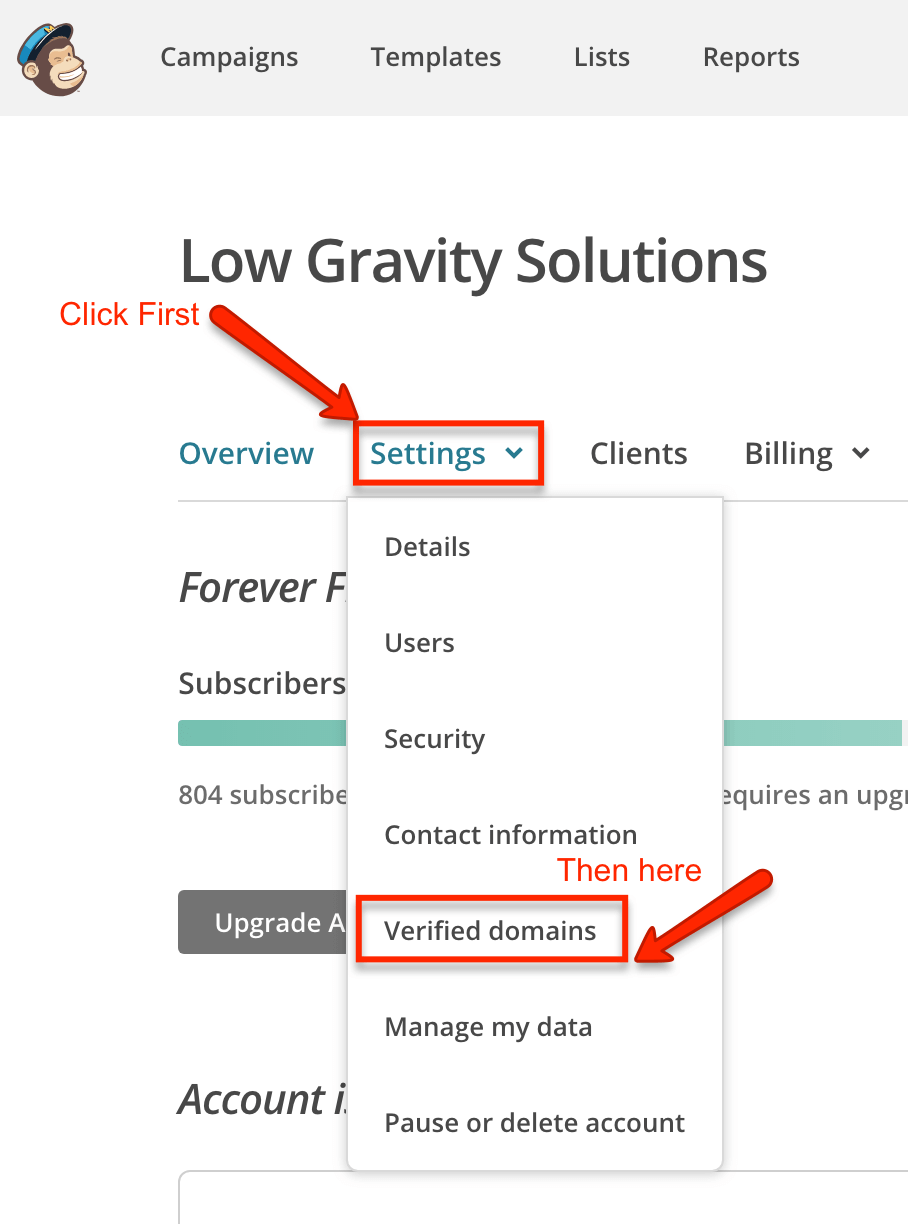
MailChimp Verified Domains

MailChimp Authentication Instructions

MailChimp Domain Authentication
MailChimp Authentication with Siteground Web Hosting
The reason I wrote this post is that I already had instructions available for Bluehost users, but I wanted to make sure I didn’t leave out Siteground, another massively popular hosting service. The steps are pretty simple and straightforward for every provider, but each provider may also require that you enter them differently.

1. Login to your Siteground cpanel. Loof for the “Domains” section in the middle of the page, and click the link for the Advanced DNS Zone Editor.
2. On the next screen, click the dropdown box and select the domain you want to authenticate with MailChimp. (If you only have one domain, this may already be selected for you.)
3. Create the TXT record per the MailChimp instructions. Enter ‘yourdomain.com’ as the Host Record just like MailChimp says.
4. Create the CNAME record exactly per the MailChimp instructions.

Siteground Advanced DNS

Siteground Choose Domain
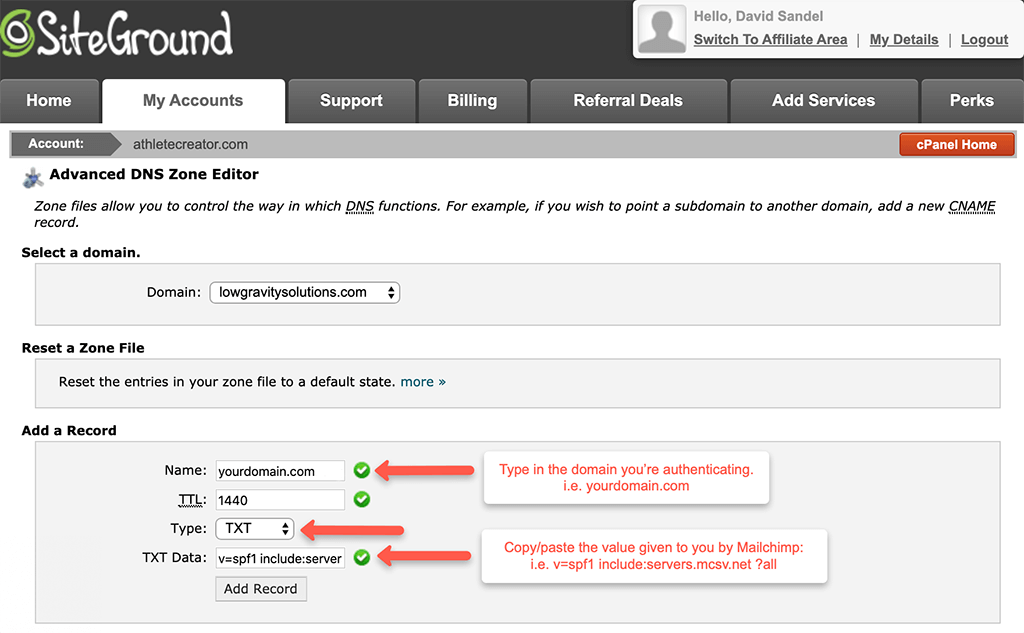
Siteground TXT Record

Siteground CNAME Record
Verifying the MailChimp Authentication Worked
Siteground and Mailchimp claim that changes in the DNS records may take 24-48 hours to propagate through the internet. In reality, I’ve had this process work as fast as immediately and as slow as 48 hours. The chance that you go back to MailChimp immediately and everything works is low, but not impossible. So if it doesn’t work right away, just try to be patient and check back whenever you have time.
The steps to verify your authentication are basically the same as above in the MailChimp section. Navigate to the “Verified Domains” screen, click on “View Setup Instructions,” but this time, you’ll click on “Authenticate Domain” when the instructions pop up.
Goodbye SPAM Folder; Hello Inbox
At this point your domain should be authenticated and in good standing with any SPAM databases (provided you didn’t kill your score prior to this already). However, it doesn’t automatically mean that if your emails were already being delivered to someone’s SPAM folder, that they will now be going to their inbox. If that’s happening, you’re not likely to know about it, and you just have to hope they check someday and add you to their safe sender’s list.
This is also not the only thing you should be doing to avoid your campaigns ending up in someone’s SPAM. Believe it or not, the words you use, subject lines, pictures, how you use links, and how often other people have marked you as SPAM or reported abuse also affects it. It’s kind of like a running score of how trustworthy you are, so make sure you’re following all the email marketing best practices. If you suspect your MailChimp campaign emails are already going to everyone’s SPAM and don’t know how to fix it, let’s get in touch and see if we can get you out of email prison. I’m an official MailChimp Expert, and I’d love to help you out.

David Sandel
Low Gravity Solutions
[contact-form-7 id=”2981″ title=”MC and SG blog post”]
Thank you for this. I’ve managed to do this for my top level domain but I can’t seem to get it to work with a subdomain. Could you show how to do that?
You have to verify and authenticate each domain you send from. So if you send from example.com, you’ll have to verify and authenticate that. If you send from sample.example.com, then you need to verify and authenticate that one too (or instead).
Thank you David. I was having a problem for some reason but I started all over and followed the steps and it works. Thanks so much.
Glad I could help!
Looks like they now have two CNAME records to add, and no SPF. Do you know why that changed?
No, no idea. I hope they’ve done some internal server work on their end so that SPF still works. If you’ve got your domain setup under these new rules from MailChimp, you can ping your DNS using MXToolbox and see what comes up. In the dropdown menu next to the button, choose “SPF” and not “TXT”.
Hello! Should I create a CNAME record or a TXT record in Siteground? Also, can records for MailerLite and MailChimp both exist in Siteground?
You’ll want to do TXT records, and yes, both platforms can exist in separate records within your DNS settings.